logo spankerking tm blanc final
Buy Now
0
$0.00 0 items

No products in the cart.

Assembly and Safety Instructions

Warning and Safety Information

Please carefully read these guidelines to ensure safe and prolonged use of your SpankerKing bench.
  • Always Use the Stabilizer : For your safety, always ensure the stabilizer is in place during your sessions. This helps prevent any risk of tipping or imbalance during use.
  • Maximum Weight Limit : The SpankerKing bench is designed to support a maximum weight of 120 kg. Exceeding this limit could compromise the bench's stability and safety.
  • Do Not Overtighten Nuts and Bolts : Accessories are generally tightened away from the visible parts of the bench. However, if you need to tighten nuts and bolts on visible surfaces, avoid overtightening to prevent marks. Ensure stability without damaging the bench’s finishes.
  • Avoid Sharp Objects : To preserve the bench’s surface, avoid placing or using sharp objects that could scratch or damage the wood or finishes.
  • Use Only on Flat Surfaces : Always place the bench on a flat, stable surface to ensure optimal safety. Uneven surfaces may cause instability or tipping. For added security, we recommend using a non-slip rug under the bench.
  • Proper Cleaning and Maintenance : Regularly clean your bench with a soft, damp cloth. Avoid harsh chemicals or abrasive materials that could damage the wood or fabric cover. The fabric cover is machine washable for easy maintenance.
  • Discontinue Use if Damaged : If any part of the bench becomes damaged or unstable, discontinue use immediately and contact our customer support team for assistance.

By following these recommendations, you ensure both the safety and longevity of your SpankerKing bench. For any questions or assistance, feel free to contact our customer support at hello@spankerking.com.

Assembly instructions

The bench is designed with 90 drill holes, allowing for a multitude of configurations. All elements can be assembled without tools. Many positions are possible, so feel free to let your imagination run wild. Depending on the chosen setup, you won’t need to assemble all the elements.
bench seat takeoff 1 66f7bf1173780
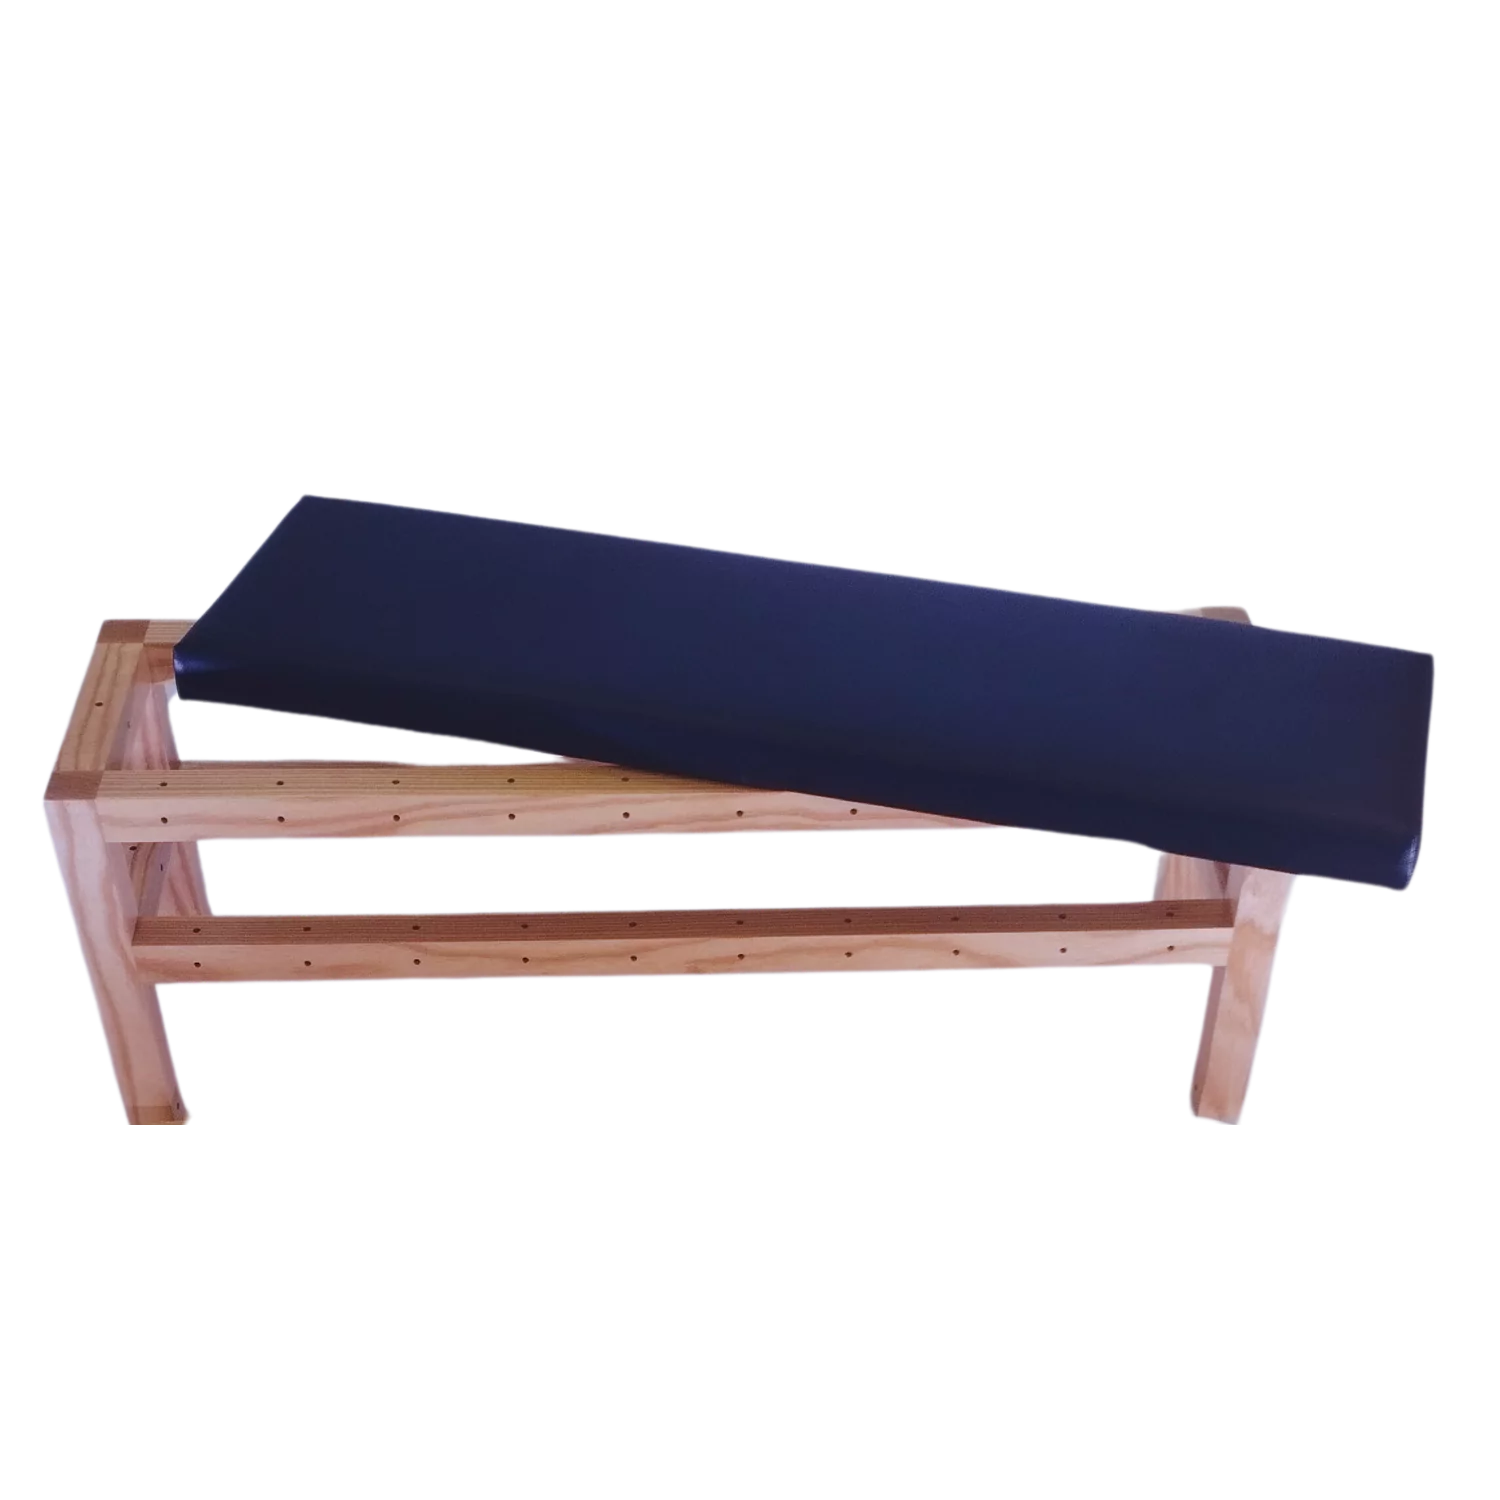
The bench structure is made from solid wood using mortise and tenon joints (no screws). This assembly is extremely sturdy and requires no further assembly on your part.

Simply place the seat on its structure using the 4 guides attached underneath the seat.
bench stabilisateur 66f7c3875bc9b
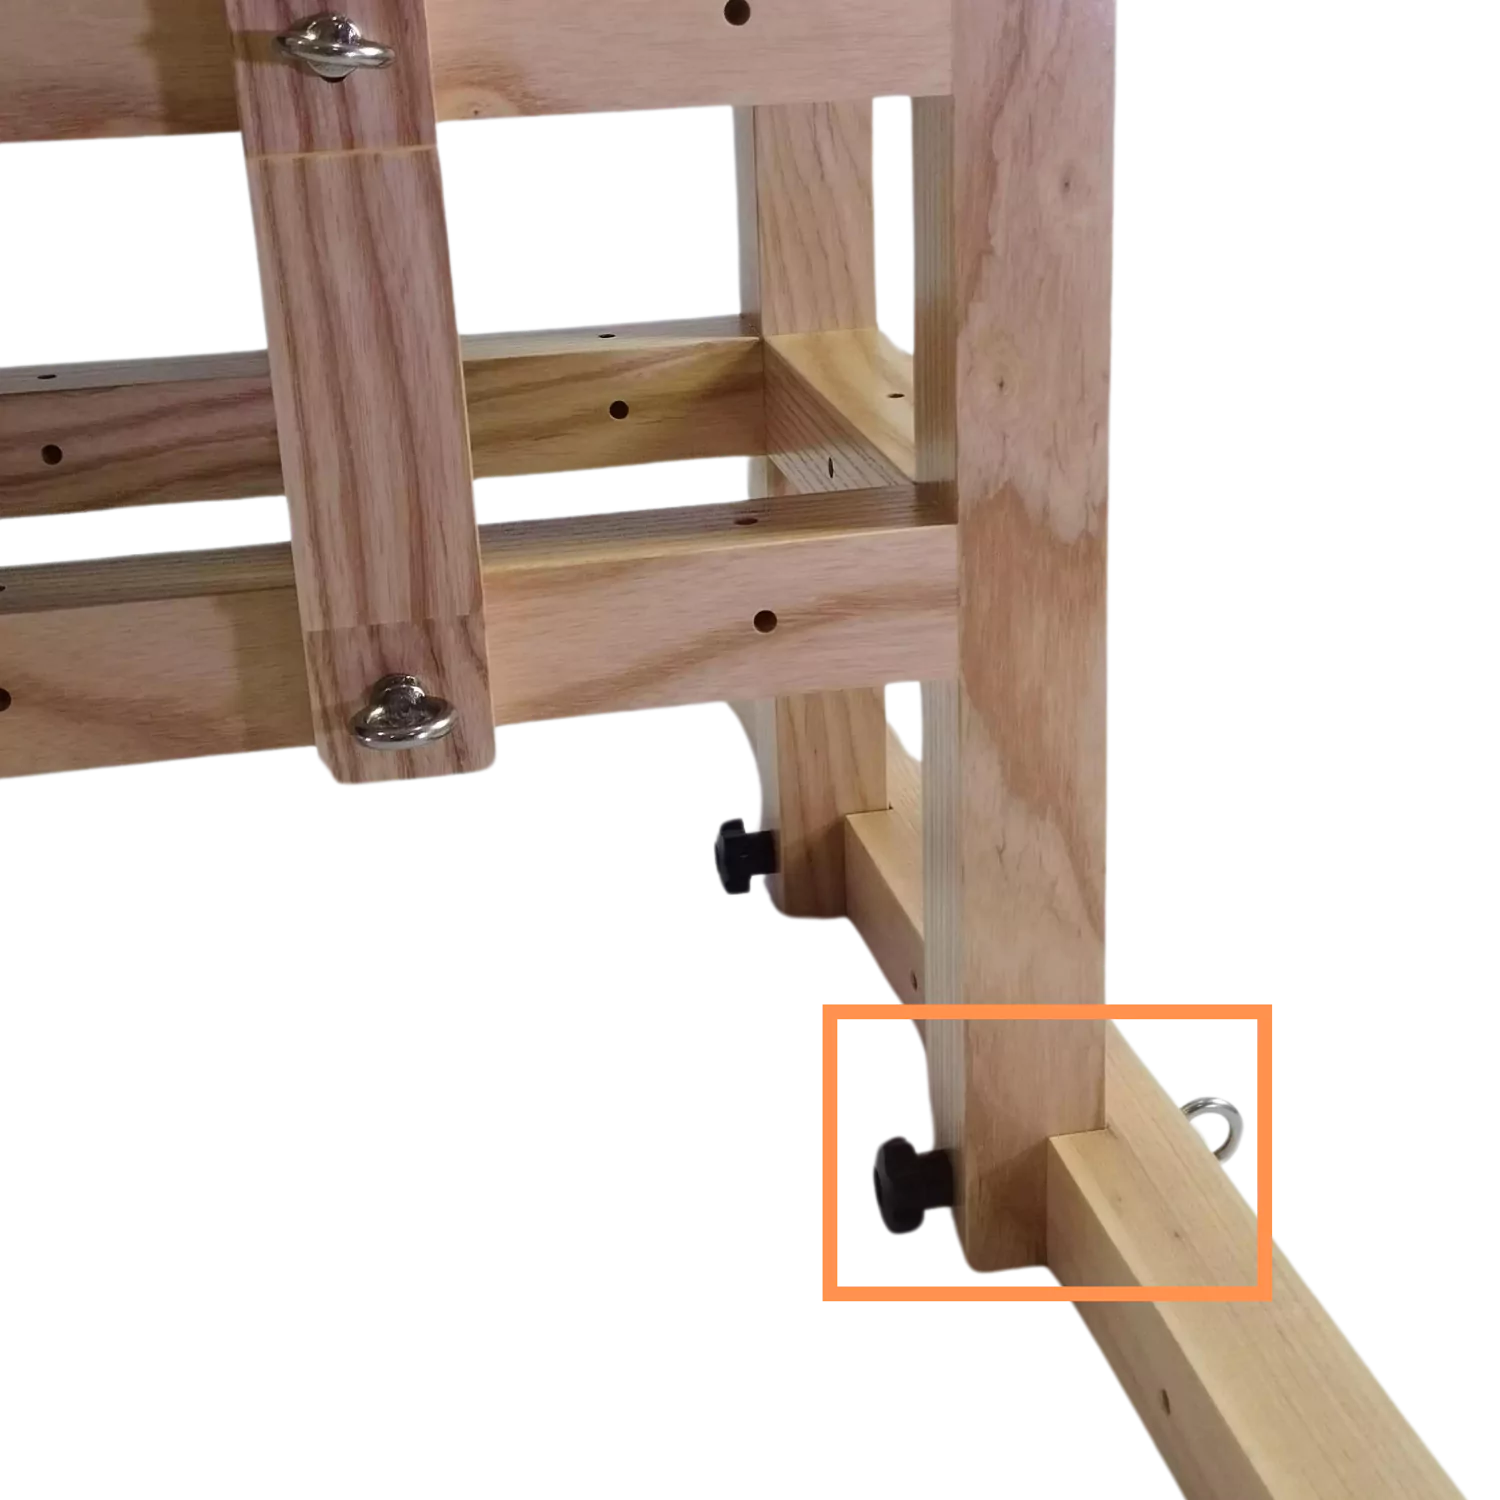
Attach the stabilizer by inserting the notches into the bench legs and securing it with the eye bolt. 
bench knee 1 66f7d68a88e00
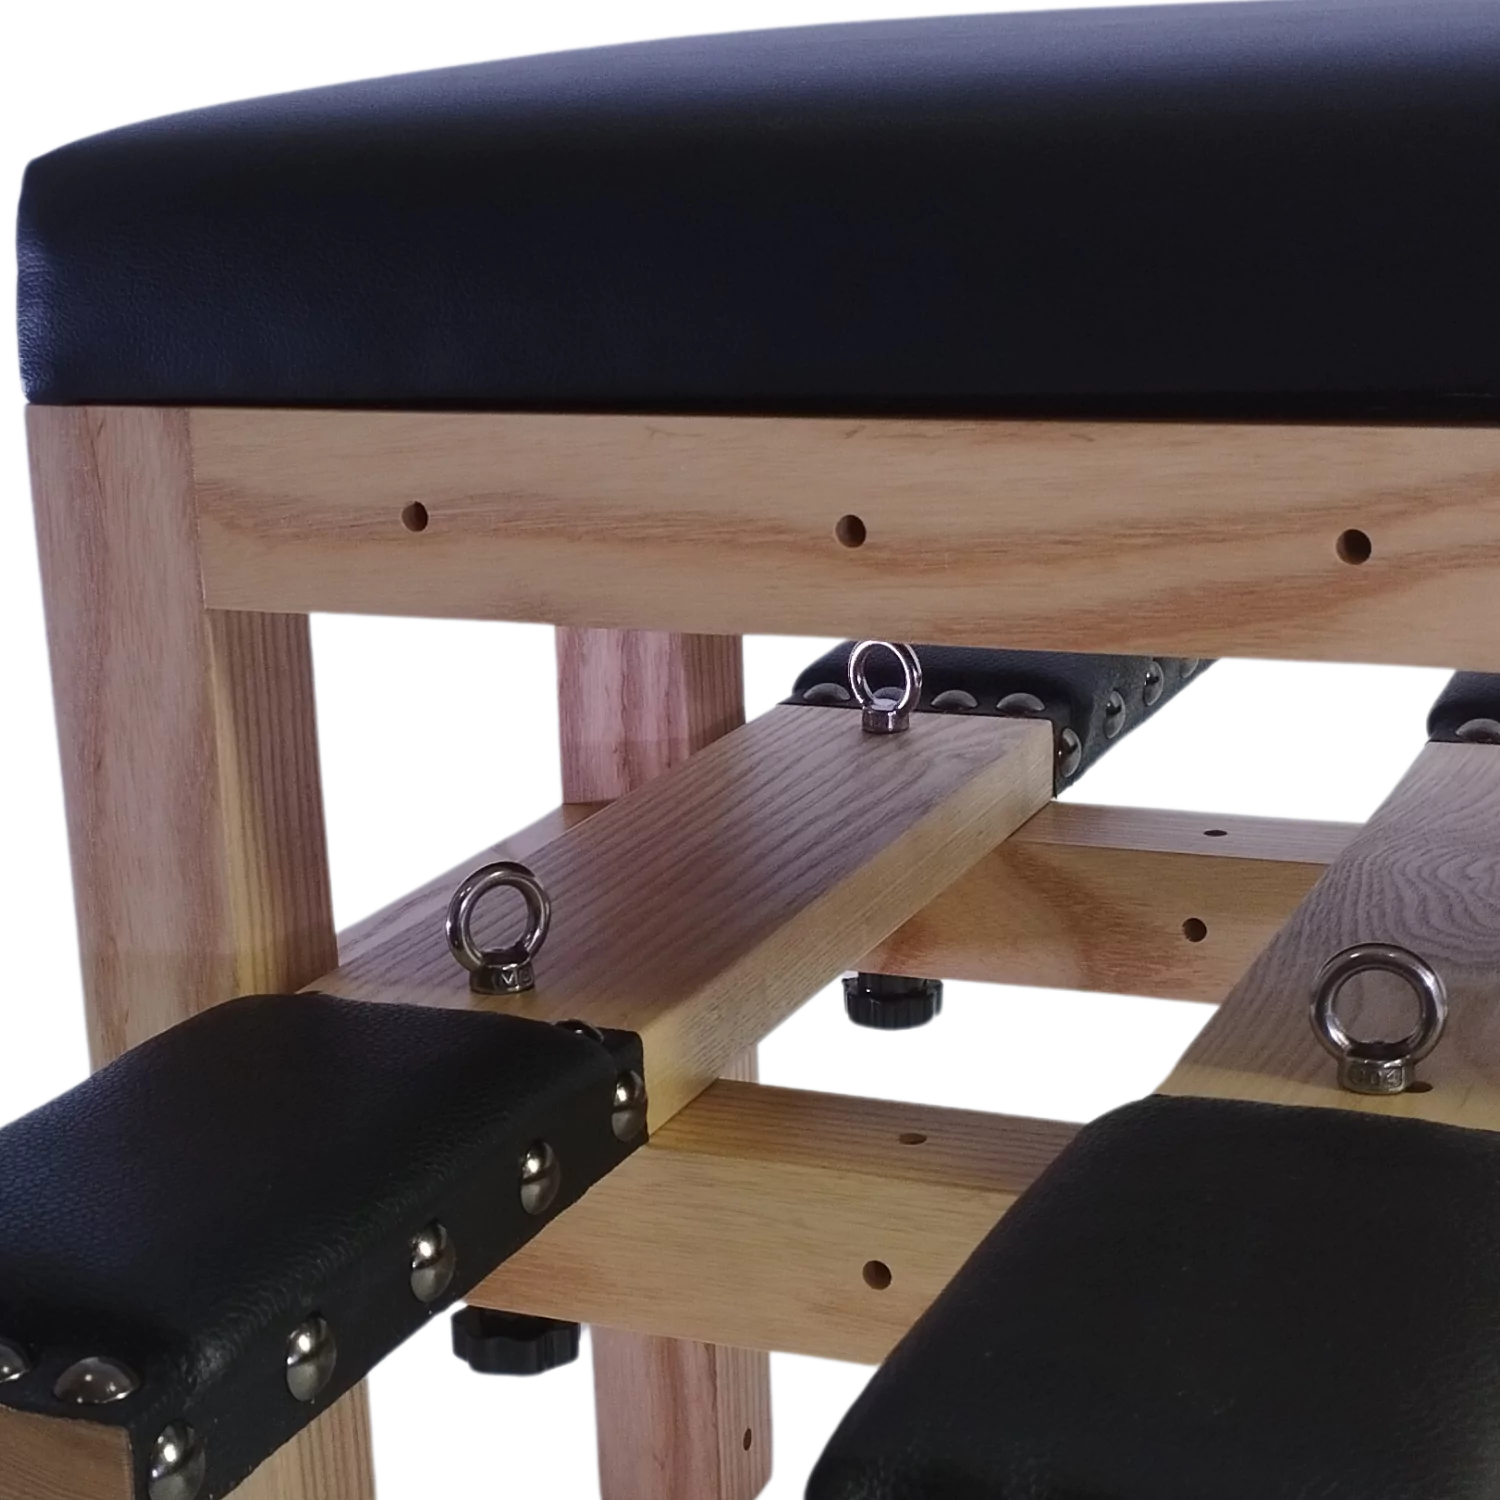
Place the knee rests in the desired position, then secure them with the eye bolts.
bench mounting 66f7c2fb661e9
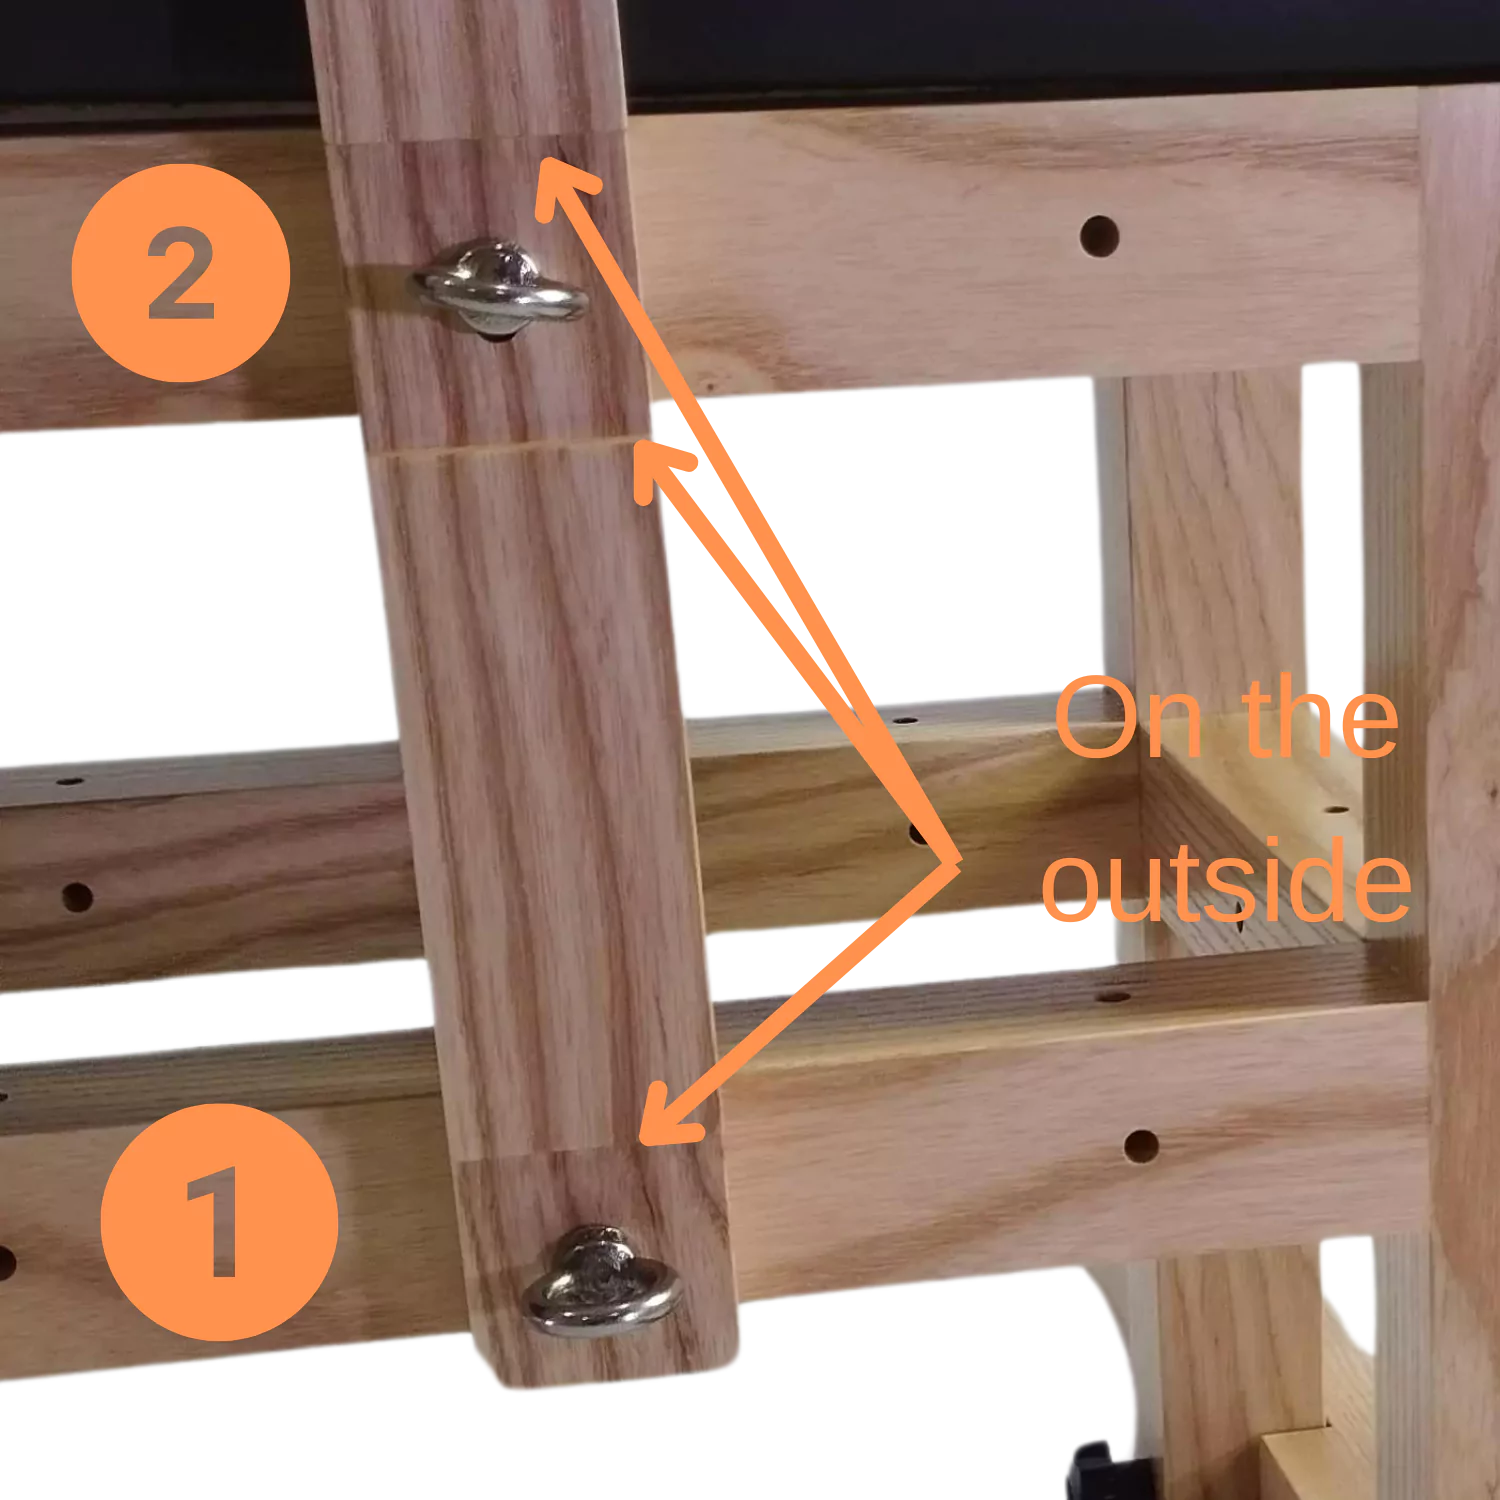
Position the uprights using the eye bolts, starting with the lower part (1) and then the upper part (2). The fittings should be on the outside.
bench restraint 1 66f7c535ed8ee
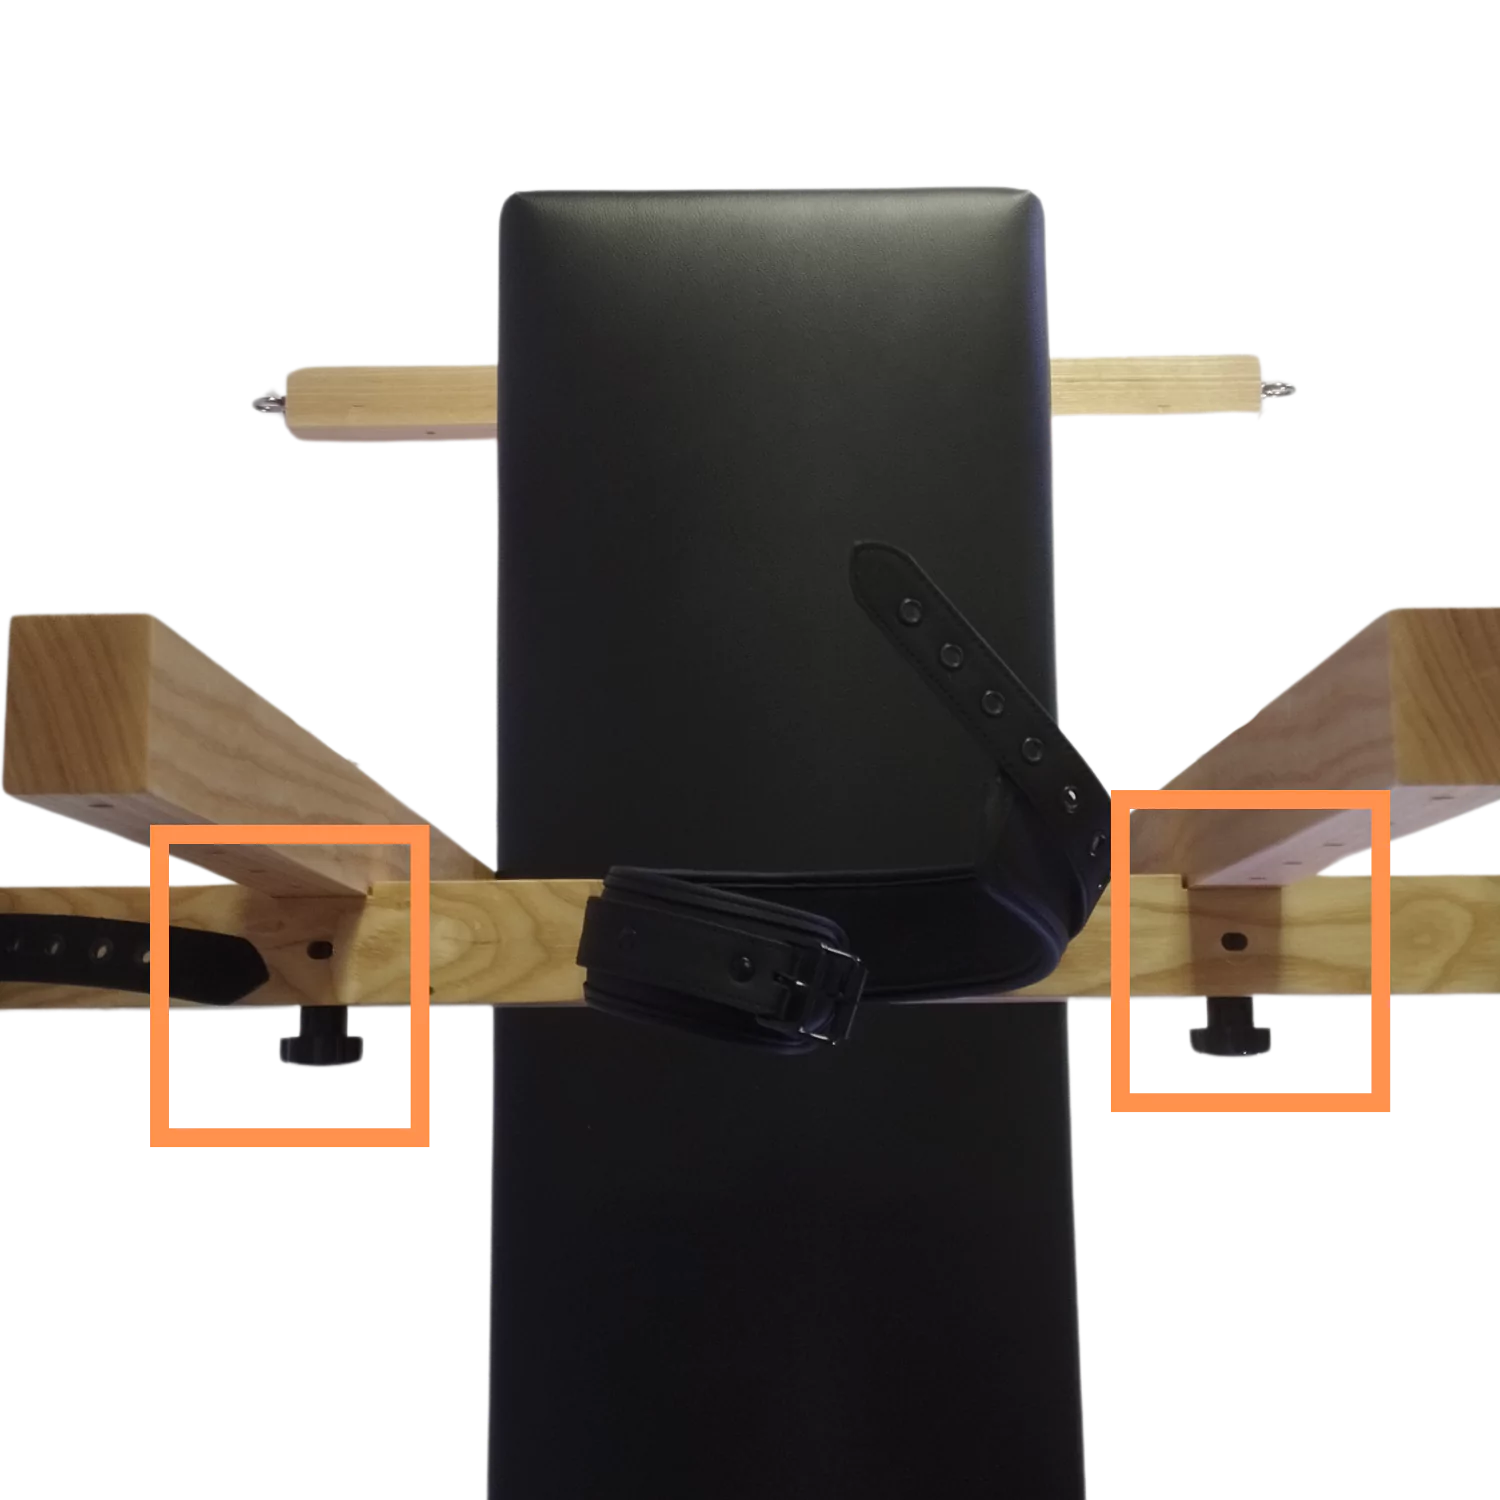
The restraint bar is machined on two sides, allowing it to be positioned as you prefer. To install it, simply insert the notches into the supports and secure it with the screws provided for this purpose.
bench cuff 66f7c5d899802
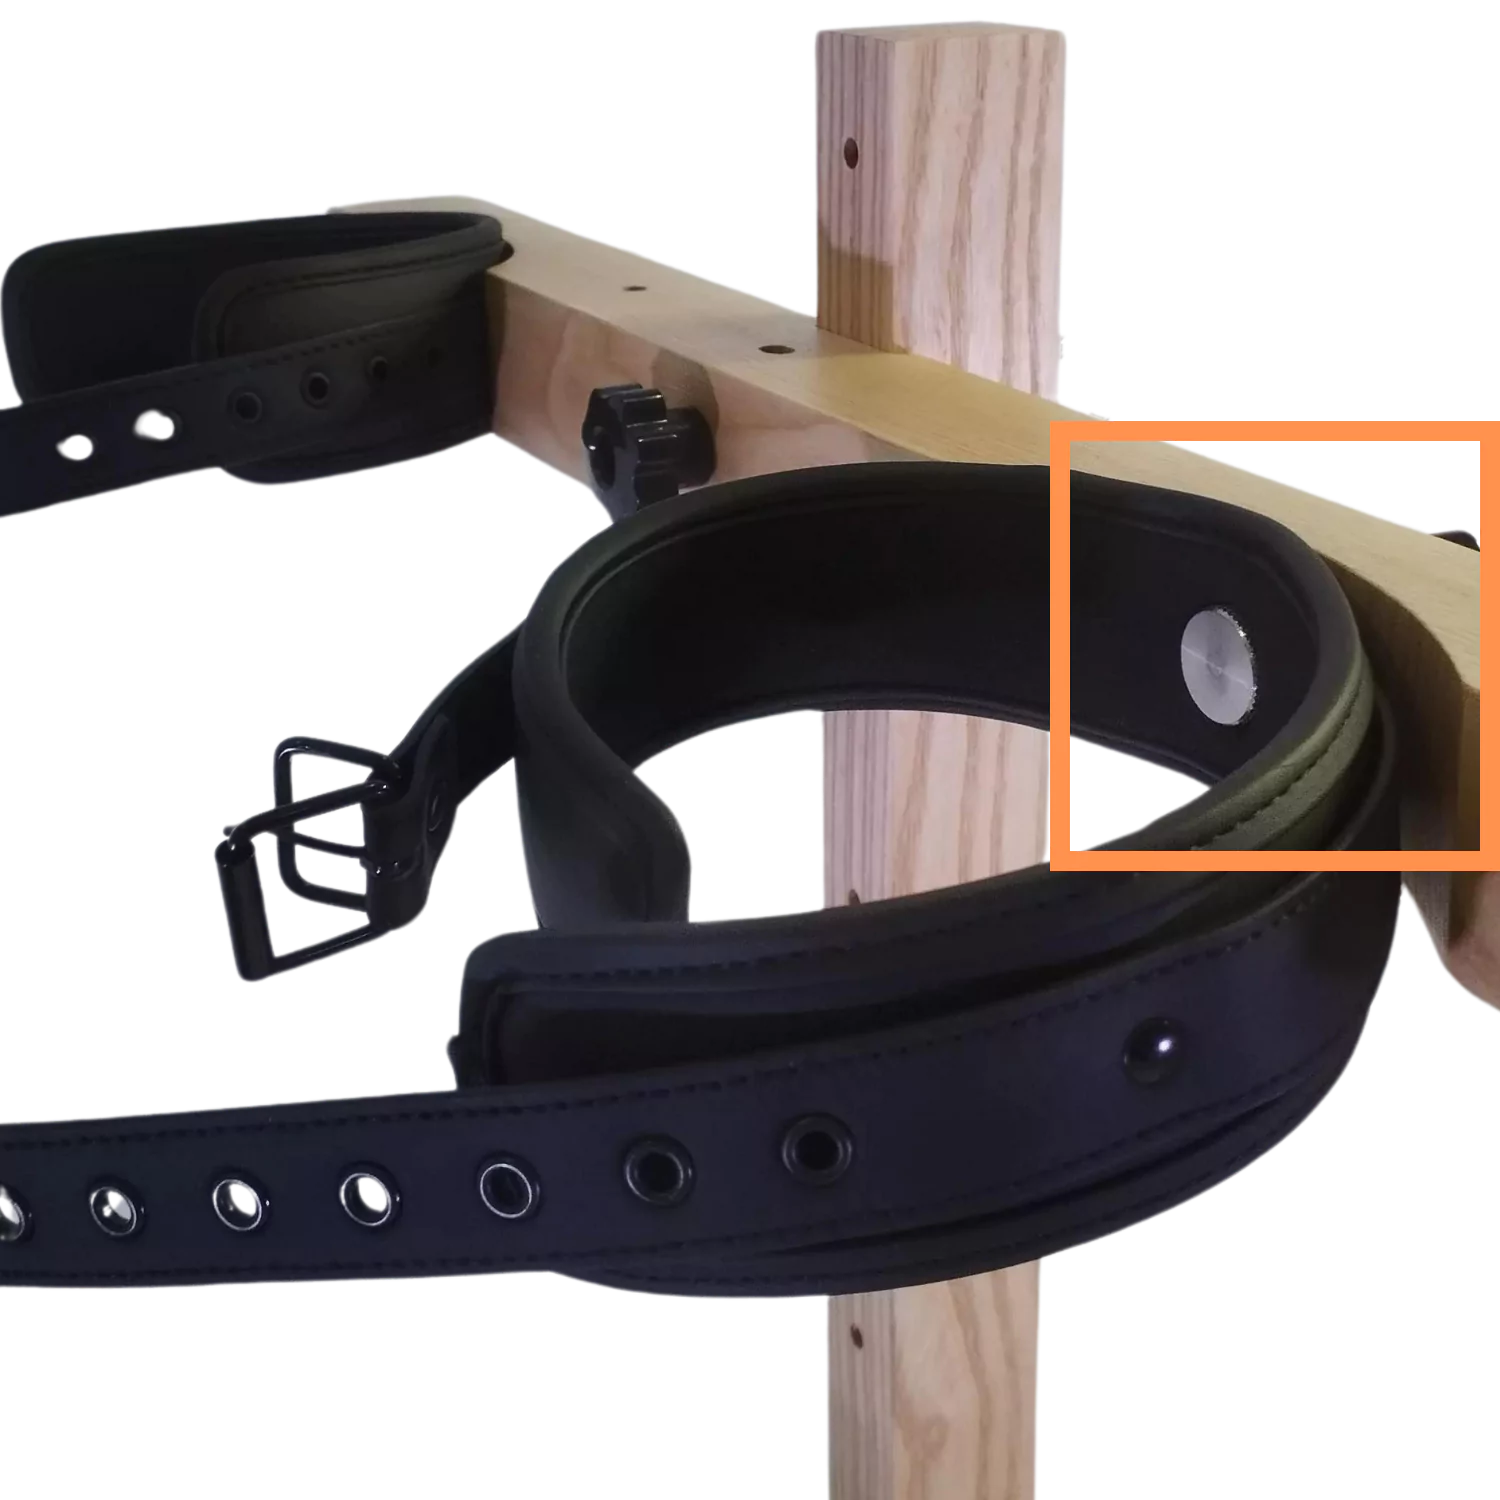
To secure the cuffs or collar to the restraint bar, simply use the flat-head screws provided.
Watch the assembly video
logo spankerking tm blanc final
© 2024 spankerking.com - All Rights Reserved.
The names, logos, and trademarks on this site are the property of P L A E R U S Studios and are protected by applicable laws. Any unauthorized reproduction, modification, distribution, or use is strictly prohibited.